This is an easy to make, moist chocolate cake. As usual I've reduced the amount of sugar added which I believe doesn't impact on the flavour of the cake as most cakes are far too sweet. However, if you prefer a sweeter cake add an additional 20g of caster sugar.
Marinade the dried fruit in Amaretto for 24hrs before making the cake. You can use any combination of unsweetened dried fruit and if you want more 'bite' to the cake add 50g chopped walnuts when you add the fruit to the cake mix.
Put the mix into a lined, round 16cm springform cake tin and bake in a pre-heated oven for 35-45mins at 180C.
Ingredients
95g unsweetened dates
55g unsweetened dried cranberries
2 tblsp Amaretto
170g unsalted butter (room temperature)
50g brown sugar
50g caster sugar
140g plain flour
1tsp baking powder
60g best quality unsweetened cocoa powder
3 medium eggs (beaten)
Method
Marinate the dried fruit in Amaretto for 24hrs.
Put the butter and both types of sugar in a mixing bowl and cream together until light and fluffy. Little by little add the beaten eggs, make sure you incorporate all the egg into the butter/sugar mix before adding more. Make sure every bit of egg is well mixed in, don't leave any visible egg in the mix. Using a metal spoon, sift and fold in the dry ingredients, flour, baking powder, cocoa powder.
Add the dried fruits and fold in. Put the mix into your pre-prepared cake tin and bake in the middle of the oven for 35-45 minutes. After 35 minutes test the cake with a skewer, if the cake is cooked the skewer can be inserted into the cake and then will come out clean. If there's cake mix on it you need to continue baking for up to 10 minutes more. The final time depends on your oven.
Cool on a wire rack and when cold store in an airtight cake-tin. If you can resist it, the cake will stay fresh for up to 5 days. It's delicious if served with natural, Greek style yoghurt. This cuts through the sweetness of the Amaretto and compliments the flavours very well. It would also be good with vanilla or chocolate ice cream.
Monday, 30 January 2012
Tuesday, 24 January 2012
Parmesan Biscuits
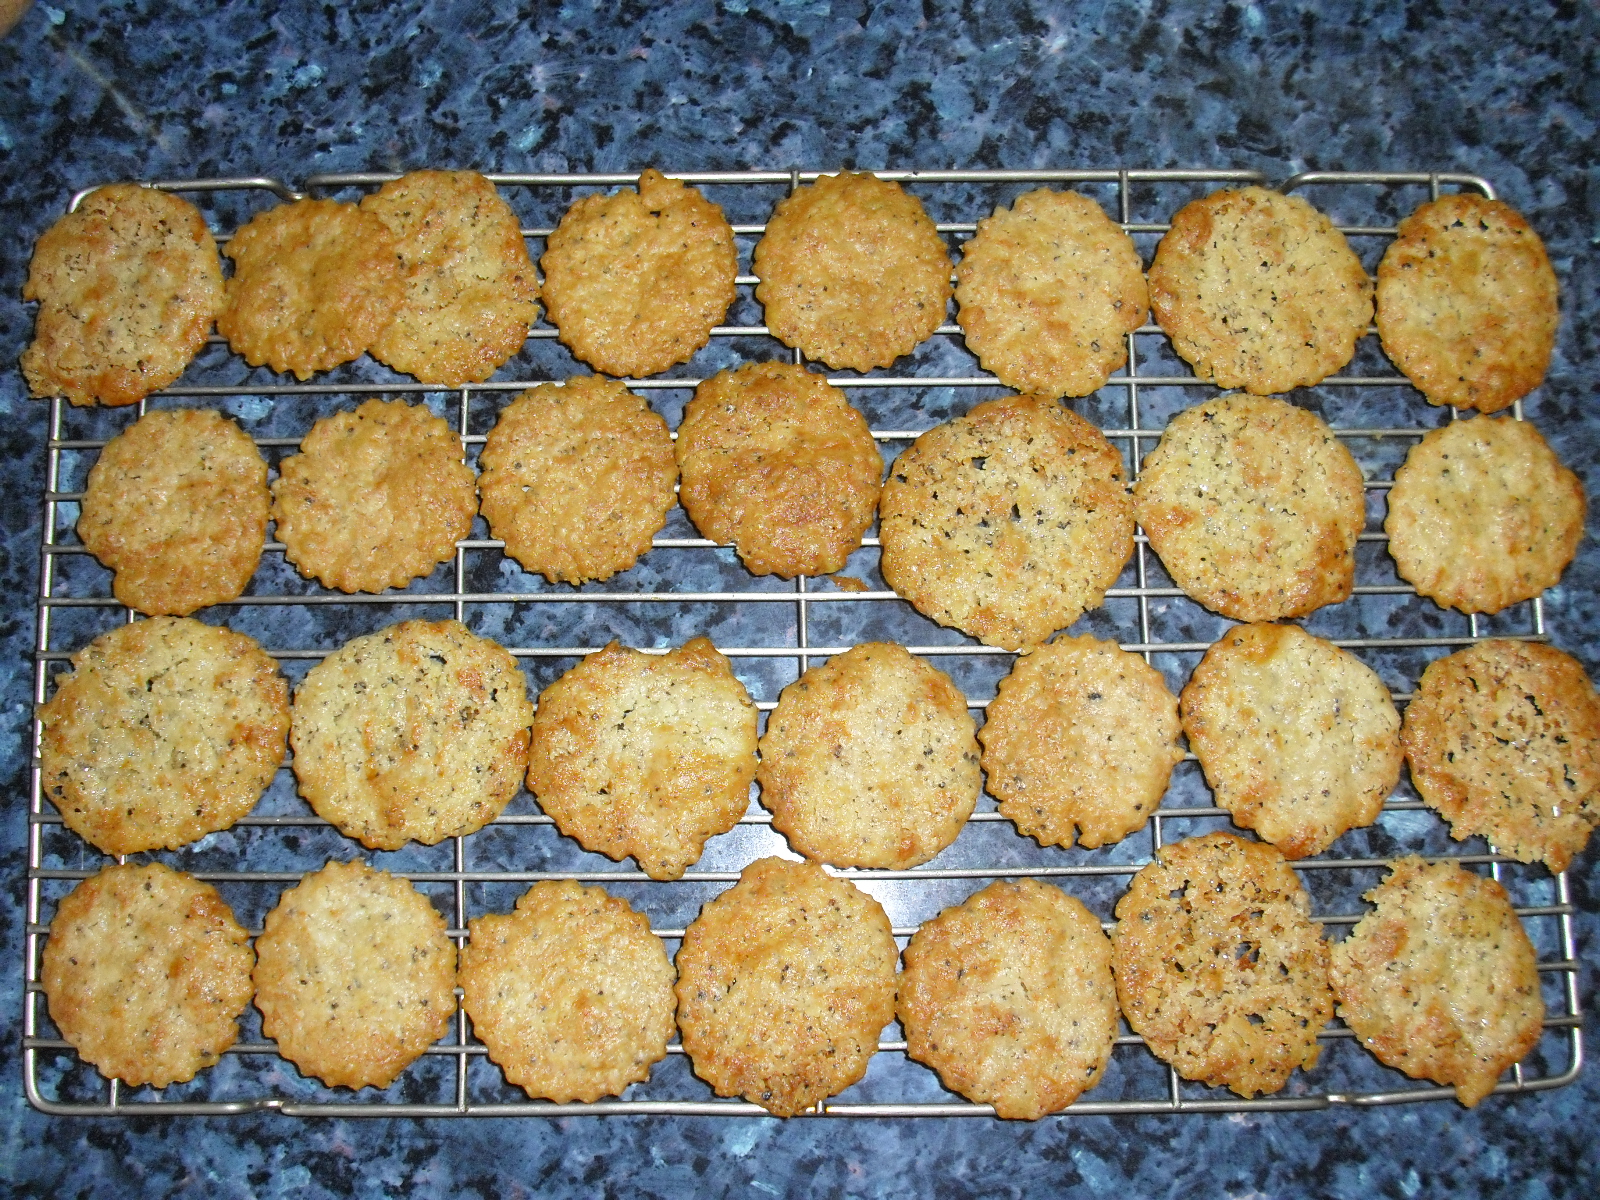
These delicious snacks won't last long and you'll find yourself making them time and again. They make a great gift and are good any time of day. I particularly like them with cranberry sauce. That mix of sweet and savoury is yummy.
They are easy to make but the temperature of your kitchen will make a difference to how easy it is to work the dough. In a very warm kitchen the dough can be pretty sticky, try not to add too much flour when you're rolling the mix. Use all your ingredients at room temperature. Makes around 30 biscuits.
Pre-heat the oven to 170C, bake for 10 minutes.
Ingredients
2oz/60g plain flour
2oz/60g butter
2oz/60g strong cheddar, grated
2oz/60g parmesan, grated
1/2 - 1 tsp freshly ground pepper
Method
Rub the butter into the flour until you get a breadcrumb consistency. Add the grated cheeses and ground pepper, stir then bring together into a dough.
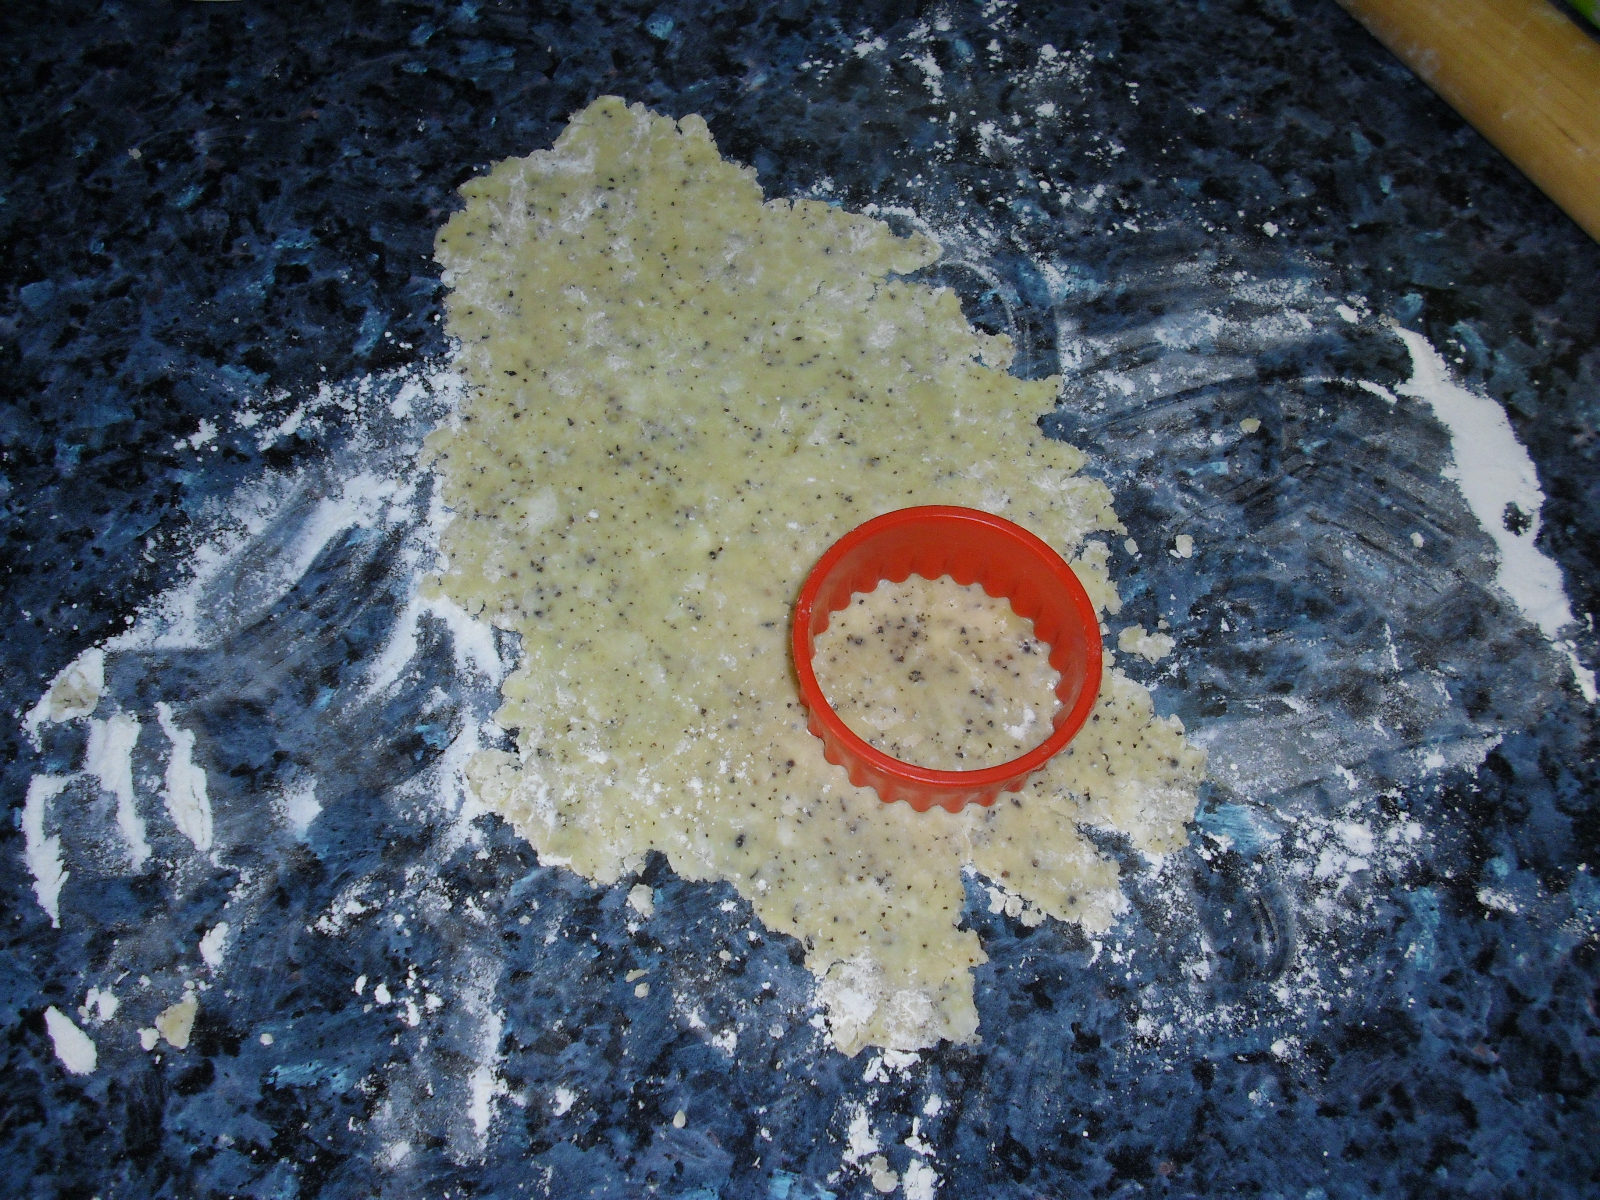
I like to roll out half the mix at a time, it makes it easier to work and to use a 4cm pastry cutter. With this recipe you can re-use and roll every last bit of dough. Roll the dough as thinly as you can.
Use parchment paper on a baking tray to ensure the biscuits don't stick. Bake for 10 minutes at just above the middle of the oven and the biscuits should be golden brown. If you are using a fan assist oven you can do the whole batch in one go but you may need to reduce the cooking time by a minute or two so keep an eye on them. Cool on a wire rack and store in an airtight tin.
They are easy to make but the temperature of your kitchen will make a difference to how easy it is to work the dough. In a very warm kitchen the dough can be pretty sticky, try not to add too much flour when you're rolling the mix. Use all your ingredients at room temperature. Makes around 30 biscuits.
Pre-heat the oven to 170C, bake for 10 minutes.
Ingredients
2oz/60g plain flour
2oz/60g butter
2oz/60g strong cheddar, grated
2oz/60g parmesan, grated
1/2 - 1 tsp freshly ground pepper
Method
Rub the butter into the flour until you get a breadcrumb consistency. Add the grated cheeses and ground pepper, stir then bring together into a dough.
I like to roll out half the mix at a time, it makes it easier to work and to use a 4cm pastry cutter. With this recipe you can re-use and roll every last bit of dough. Roll the dough as thinly as you can.
Use parchment paper on a baking tray to ensure the biscuits don't stick. Bake for 10 minutes at just above the middle of the oven and the biscuits should be golden brown. If you are using a fan assist oven you can do the whole batch in one go but you may need to reduce the cooking time by a minute or two so keep an eye on them. Cool on a wire rack and store in an airtight tin.
You can use other cheeses than parmesan and cheddar but those two work best. Also, because the fat content of cheese varies you may need to experiment with the cooking time and quantities if you use different cheese.
These are not a low cholesterol or low calorie snack but they are worth every mouthful if you want something different for a savoury treat.
Easy Vegetarian Samosas
Homemade samosas are much tastier than the shop bought variety and are more versatile as you can change the spice mix and/or filling to suit your tastes.
Instead of folding the pastry into a traditional triangle I use a pastry cutter and make 'pasty' shaped samosas. This recipe makes 22 samosas with a little filling left over to turn into a lovely curry! You'll also need a little sunflower oil for shallow frying.
Filling Ingredients 1 carrot finely diced
1 medium sized potato peeled and diced
2 tblsp frozen peas
1 small onion finely diced
2 cloves garlic finely chopped
1 tsp aromatic salt (*sea salt, allspice, cinnamon)
1 tblsp sunflower oil1tsp each cumin seed, coriander seed, garam masala
1 red chilli (de-seed if you don't want them as spicy)
Method
Put the oil in a heavy based frying pan and heat to a medium heat. Grind the cumin and coriander seeds, add the aromatic salt and garam masala, add to the oil and cook for a minute, add all the other ingredients and stir well, turn the heat down and leave everything to sautee until cooked through, turn off the heat, add the peas, stir and leave everything to go cold.
1/2 tsp table salt
1 tblsp sesame oil (if you don't have this use sunflower oil)
cold water to mix to a soft but not wet doughMethodput the flour and salt into a bowl, add the oil and mix with a knife, add the water and bring the mix together into a soft dough, cover with clingfilm and set aside for 1 hour.
On a lightly floured board
roll out the pastry to 2 or 3mm, use a 10cm metal chef ring or pastry cutter to cut your samosas. Use a flour and water mix as 'glue' to seal the samosa. Using a pastry brush, lightly brush the 'glue' mix all around the edge of the pastry circle. Add a teaspoonful of cold filling to one side of the circle then fold the pastry over and press the edges down. If your kitchen is very warm only make 4 samosas before cooking them as the pastry can become slightly sticky and more difficult to work.
Shallow fry in vegetable oil, for 2 - 3 minutes per side until golden brown, cook a few at a time.
Delicious eaten hot or cold. These samosas freeze really well too and can be re-heated from frozen in the oven at 180C for 15-20 minutes. Two per person make a great starter with a little salad and mango chutney or lime pickle or a yoghurt dip.
* aromatic salt: 500g coarse sea salt, 1 heaped teaspoon allspice, 1 heaped teaspoon cinnamon powder. Mix everything together and store in an airtight jar and use as stated in the recipe.
Thursday, 29 December 2011
Perfect Fruit Cake
It's easy to make a perfect, moist fruit cake. This cake can be made with or without alcohol and you can choose the types of dried fruit you prefer. I like to use a semi dried fruit rather than something that has been too dessicated. It makes for a much tastier, moist cake. Also, I always use butter not artificial spreads and use less flour and sugar than most recipies would tell you to use.
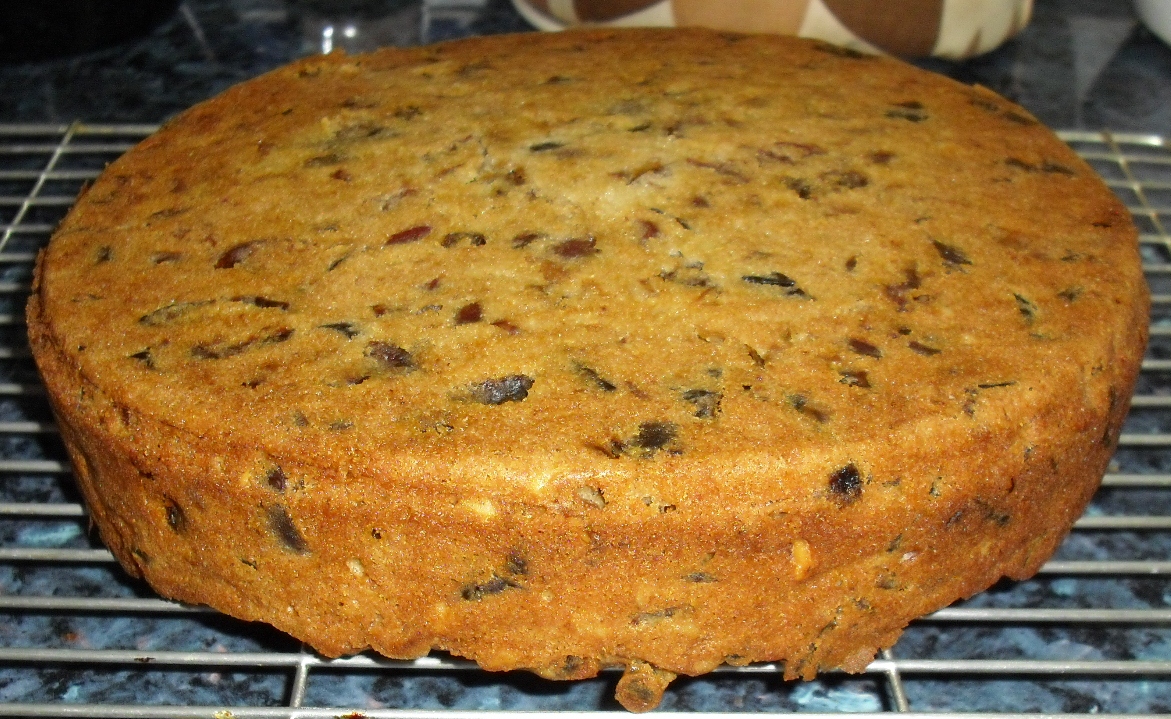
For this cake (pictured) I marinated the dried fruit in whisky for 2 weeks before using.
Ingredients
170g butter
140g brown sugar
75g chopped walnuts
440g mixed dried cherries and dates
50g sultanas
1tsp baking powder
200-225g plain flour
3 large eggs - beaten
whisky to personal taste
Method
Put the mix into your cake tin and bake for one hour without opening the oven. Check the cake with a metal skewer, if the skewer comes out clean the cake is done (depending on your oven, it may be cooked or may need between 5 and 20 minutes more). After the first hour keep checking the cake every 5 minutes if it seems nearly cooked or after 15 minutes if the skewer is still quite covered in mix. Many recipies give a cook time of 2 hours or more, this is usually far too long and creates a dry cake.
For this cake (pictured) I marinated the dried fruit in whisky for 2 weeks before using.
Ingredients
170g butter
140g brown sugar
75g chopped walnuts
440g mixed dried cherries and dates
50g sultanas
1tsp baking powder
200-225g plain flour
3 large eggs - beaten
whisky to personal taste
Method
Preheat your oven to 170C, do not use fan assist for cake baking. Line a 16cm springform cake tin and set aside.
If you have one, use an electric whisk to cream your butter and sugar together, if not put effort into creaming them together as the more you beat them the lighter your finished cake. Slowly add the beaten eggs to the butter/sugar mix and incorporate well. Don't worry too much if the mix seems to curdle, you can add a spoonful of flour and mix that in.
Now add the walnuts and all the dried fruits and mix them well into the butter, sugar, egg mix.
Add the tsp of baking powder and using a metal spoon, fold in the plain flour. Keep folding until all the flour is fully mixed into the wet mix.
Once the cake is cooked, leave it for a few minutes in the tin then turn out onto a cooling rack and if you are using alcohol, pour 2 tblsp of whisky over your cake while it is hot. Once it's completely cold wrap it in foil and set aside (if you can bear to not eat it!) for 2 or more weeks.
Enjoy
Monday, 17 October 2011
Focaccia
This is my simple, pretty much foolproof recipe for a perfect focaccia. It's a very easy to create different flavours of focaccia so you can easily use more garlic, or no garlic, sun-dried tomatoes or thyme instead of rosemary.. the choices are endless. You can use wholemeal flour instead of plain white but the texture will be different.
For this recipe I've used the garlic, rosemary and rock salt purely as toppings and not included them in the dough. If you want, increase the amount of garlic and rosemary, chop them finely and add to the dry ingredients before adding your water to make the dough.
Recipe
225g plain white flour (no need to use strong white flour)
1/2 tsp salt
1 sachet dried yeast
150ml warm water
1 tbsp good olive oil
Topping
5 or 6 cloves of garlic, thinly sliced
several sprigs of rosemary
large grain sea salt
good extra virgin olive oil
Method
Put all of the dry ingredients into a bowl then add the tablespoon of olive oil, add the water and bring together into a rough dough. If you want to add garlic, rosemary and black olives to the dough do that before you add the water, then mix together. Make sure any additions are well chopped and not in too large pieces.
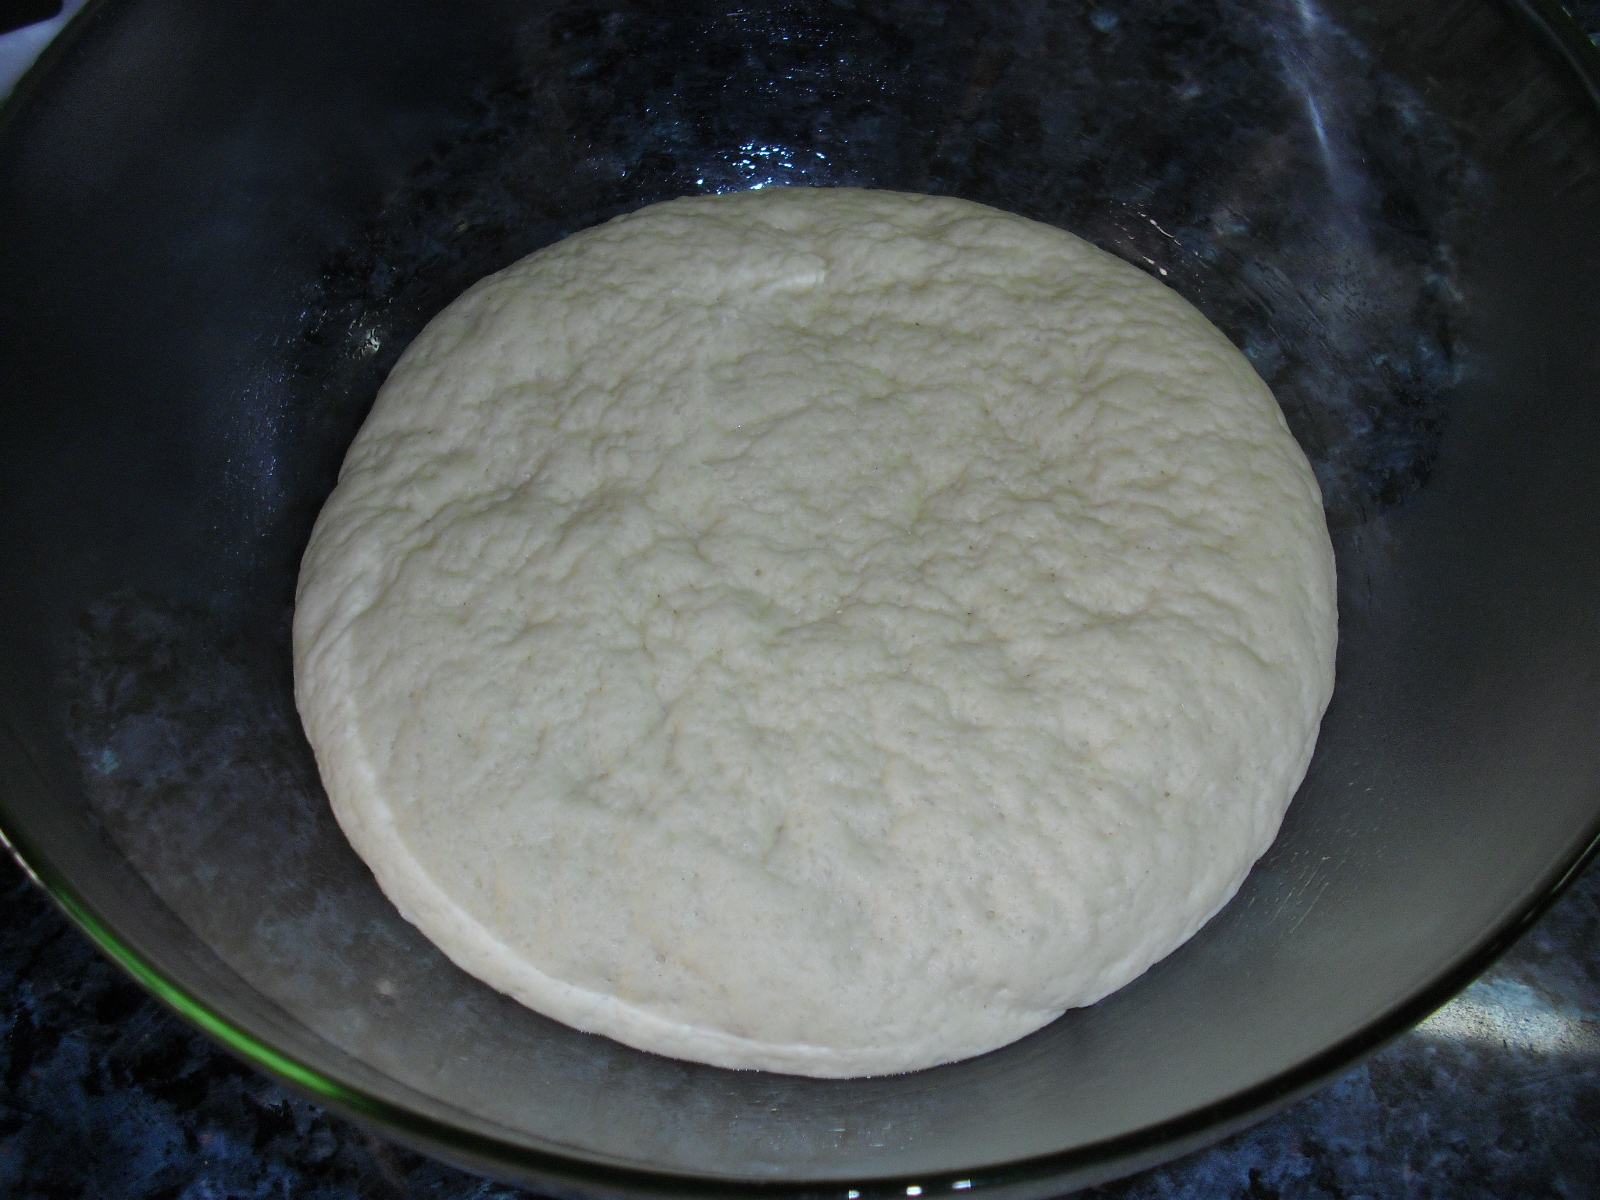
Once you have brought the ingredients together your dough should look something like this.
Using only a small amount of flour on a board or work surface knead the dough for 10 minutes or until it looks smooth and shiny.
Put the kneaded dough into a clean and lightly oiled bowl. Cover with a hot damp tea towel and leave in a warm place for 30-40 minutes. The time you need to rise the dough will depend on the temperature of the place you leave the dough. It will double in size and look slightly spongy when it's ready for a second light knead.
Once the dough has gone through the first rise, take it out of the bowl and on a lightly floured surface knead for a minute or two only. Roll out the dough to roughly 1cm thick. I like to bake my breads on an oven tray covered in parchment (baking) paper. That way I find you don't need to oil anything and the bread never sticks.
Traditionally focaccia is tear drop shaped but that's just a matter of aesthetics. Whatever shape yours ends up won't affect the taste!
I like to make my indentations (use knuckles) on the dough now, it's traditional to do it after the second rise and before you add any toppings. Cover the dough with lightly oiled clingfilm and allow it to rise a second time. At this stage I slice my garlic and wash the rosemary and pre-heat the oven to 200C, 400F or gas mark 6. By the time the oven is heated the bread will be ready for topping.
In the indentations (make them now if you didn't do them before) place the garlic slices, the sprigs of rosemary and a good sprinkling of extra virgin olive oil.
Bake in a heated oven for 25-28 minutes until golden brown. The bread is done when if you tap the underneath and it sounds hollow.
Put the bread on a cooling rack, pour some more olive oil over it and sprinkle a generous amount of sea salt over the focaccia.
Focaccia is best eaten straight away and is yummy with all kinds of dishes.
You can replace the garlic and rosemary with an equal amount of sun-dried tomatoes and thyme.
For this recipe I've used the garlic, rosemary and rock salt purely as toppings and not included them in the dough. If you want, increase the amount of garlic and rosemary, chop them finely and add to the dry ingredients before adding your water to make the dough.
Recipe
225g plain white flour (no need to use strong white flour)
1/2 tsp salt
1 sachet dried yeast
150ml warm water
1 tbsp good olive oil
Topping
5 or 6 cloves of garlic, thinly sliced
several sprigs of rosemary
large grain sea salt
good extra virgin olive oil
Method
Put all of the dry ingredients into a bowl then add the tablespoon of olive oil, add the water and bring together into a rough dough. If you want to add garlic, rosemary and black olives to the dough do that before you add the water, then mix together. Make sure any additions are well chopped and not in too large pieces.
Once you have brought the ingredients together your dough should look something like this.
Using only a small amount of flour on a board or work surface knead the dough for 10 minutes or until it looks smooth and shiny.
Put the kneaded dough into a clean and lightly oiled bowl. Cover with a hot damp tea towel and leave in a warm place for 30-40 minutes. The time you need to rise the dough will depend on the temperature of the place you leave the dough. It will double in size and look slightly spongy when it's ready for a second light knead.
Once the dough has gone through the first rise, take it out of the bowl and on a lightly floured surface knead for a minute or two only. Roll out the dough to roughly 1cm thick. I like to bake my breads on an oven tray covered in parchment (baking) paper. That way I find you don't need to oil anything and the bread never sticks.
Traditionally focaccia is tear drop shaped but that's just a matter of aesthetics. Whatever shape yours ends up won't affect the taste!
I like to make my indentations (use knuckles) on the dough now, it's traditional to do it after the second rise and before you add any toppings. Cover the dough with lightly oiled clingfilm and allow it to rise a second time. At this stage I slice my garlic and wash the rosemary and pre-heat the oven to 200C, 400F or gas mark 6. By the time the oven is heated the bread will be ready for topping.
In the indentations (make them now if you didn't do them before) place the garlic slices, the sprigs of rosemary and a good sprinkling of extra virgin olive oil.
Bake in a heated oven for 25-28 minutes until golden brown. The bread is done when if you tap the underneath and it sounds hollow.
Put the bread on a cooling rack, pour some more olive oil over it and sprinkle a generous amount of sea salt over the focaccia.
Focaccia is best eaten straight away and is yummy with all kinds of dishes.
You can replace the garlic and rosemary with an equal amount of sun-dried tomatoes and thyme.
Thursday, 6 October 2011
Lemon & Lime Pickle with Ginger & Chilli
Making pickle is very easy, just time consuming in terms of chopping the fruit and waiting for the pickle to mature. It's much cheaper to make your own and once you do you'll never go back to store bought. The beauty of doing your own is you can control the spice strength and the overall flavour. This recipe is one of my favourites from many trials.
Start with roughly the same overall amount of lemons to limes. I like it slightly more lime flavoured so have added one extra lime to this batch.
Ingredients
6 or 7 limes (unwaxed or washed and scrubbed)
3 lemons (unwaxed or washed and scrubbed)
1 tblsp chopped fresh ginger
3 fresh red chillies, chopped
1 tsp dried chopped chillies
1 tsp coriander seeds
1 tsp cumin seeds
1 tsp mustard seeds
1/2 tsp nigella seeds
2 tbsp vinegar (any kind)
4 tbsp salt
1/2 tsp asafoetida (hing) for sterilising your jar
Method
Begin by gently roasting the dried chillies, coriander, cumin, mustard and nigella seeds until hot to the touch. Make sure you don't burn the mix or your final pickle will have a bitter flavour. Once the seeds become hot to the touch put the mix into a mortar and leave to cool.
While your spices are cooling, start chopping the lemons and limes retaining as much juice as possible. I like to cut the ends off the lemons and limes plus make sure there are no pips included. I know people who use the whole fruit, ends, pips and all so I leave that up to you. Put the retained juice with the vinegar into a jug and set aside. I like to cut each piece of fruit into at least 24 pieces. You'll find that once the pickle is ready to eat the pieces will be larger than when you first cut them and if you start with large pieces you'll end up with a pickle that's not as easy to eat. This is of course down to personal preference.
In the pestle and mortar, grind your now cool masala mix. It's up to you how finely you grind your mix. I like a slightly coarse texture so don't grind the mix to a fine powder. Once the mix is to the texture you want, add the turmeric and mix in.
Chop the fresh chillies and the fresh ginger and set aside with the 4 tbsp of salt. Keep these ingredients separate.
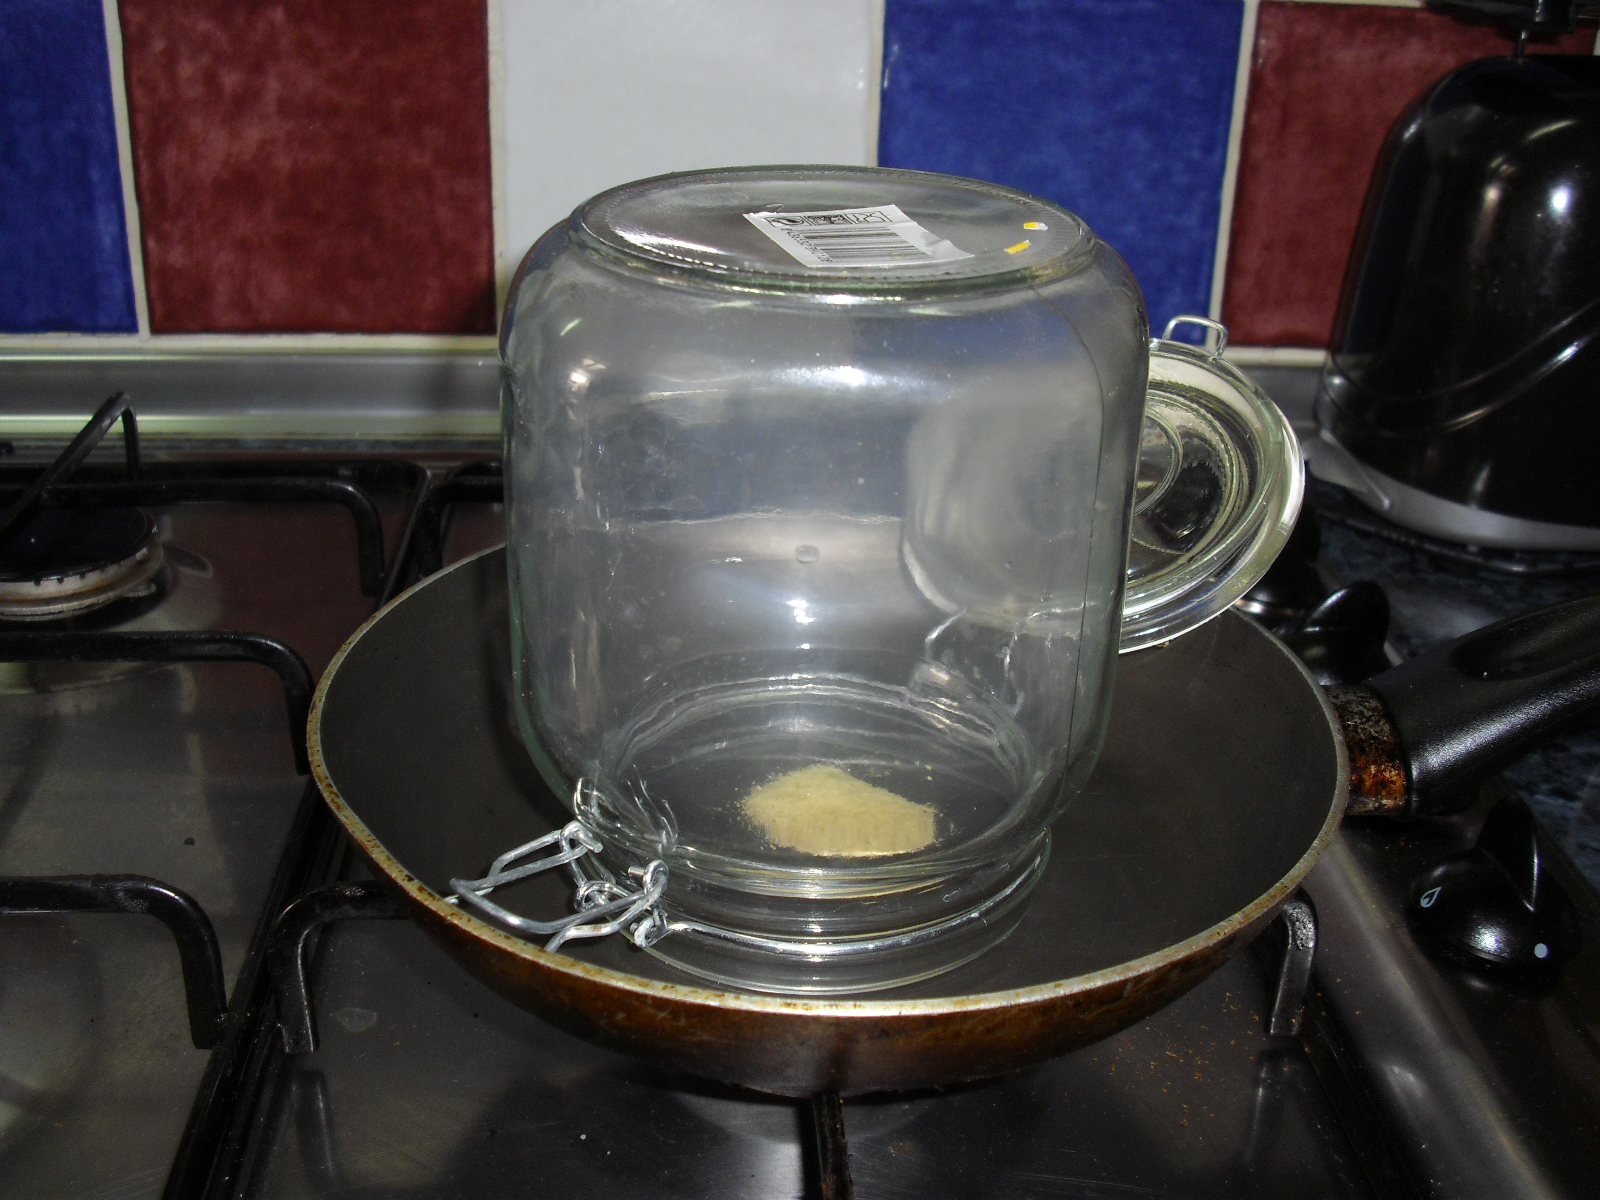
Sterilise your clean jar by putting a small amount of asafoetida (hing) into a small frying pan and heating until the powder smokes. Place your jar over the smoke and let the jar fill with the asafoetida smoke, leave for one to two minutes. This is a very traditional Indian method of sterilising.
You are now ready to start layering all your ingredients. Begin with a layer of your masala mix, then add a layer of the fruit mix, add a few pieces of ginger and a few pieces of chilli, then a layer of salt. Continue in this way until all the mixes are used up. Finally add the retained juice/vinegar mix then seal the jar and leave it alone for 3 days.
On day 4 give your mix a good stir with the handle of a wooden spoon. Stir the mix every other day for 25 to 30 days after which time all the peel should be lovely and soft and all the flavours well developed. Any juices will also have thickened. If you are lucky enough to live somewhere with sunshine you can speed up the maturing process by placing the jar in sunlight for a couple of hours a day, make sure the jar is covered with a muslin cloth or a tea towel. Be patient, the end result will be worth the wait and the finished pickle can last for a very long time. It doesn't in my house as we eat it pretty quickly.
This is my fresh batch of pickle, made today so there's no photo of the final product. In 25 days or so I'll post a photo of the end result.
Start with roughly the same overall amount of lemons to limes. I like it slightly more lime flavoured so have added one extra lime to this batch.
Ingredients
6 or 7 limes (unwaxed or washed and scrubbed)
3 lemons (unwaxed or washed and scrubbed)
1 tblsp chopped fresh ginger
3 fresh red chillies, chopped
1 tsp dried chopped chillies
1 tsp coriander seeds
1 tsp cumin seeds
1 tsp mustard seeds
1/2 tsp nigella seeds
2 tbsp vinegar (any kind)
4 tbsp salt
1/2 tsp asafoetida (hing) for sterilising your jar
Method
Begin by gently roasting the dried chillies, coriander, cumin, mustard and nigella seeds until hot to the touch. Make sure you don't burn the mix or your final pickle will have a bitter flavour. Once the seeds become hot to the touch put the mix into a mortar and leave to cool.
While your spices are cooling, start chopping the lemons and limes retaining as much juice as possible. I like to cut the ends off the lemons and limes plus make sure there are no pips included. I know people who use the whole fruit, ends, pips and all so I leave that up to you. Put the retained juice with the vinegar into a jug and set aside. I like to cut each piece of fruit into at least 24 pieces. You'll find that once the pickle is ready to eat the pieces will be larger than when you first cut them and if you start with large pieces you'll end up with a pickle that's not as easy to eat. This is of course down to personal preference.
In the pestle and mortar, grind your now cool masala mix. It's up to you how finely you grind your mix. I like a slightly coarse texture so don't grind the mix to a fine powder. Once the mix is to the texture you want, add the turmeric and mix in.
Chop the fresh chillies and the fresh ginger and set aside with the 4 tbsp of salt. Keep these ingredients separate.
Sterilise your clean jar by putting a small amount of asafoetida (hing) into a small frying pan and heating until the powder smokes. Place your jar over the smoke and let the jar fill with the asafoetida smoke, leave for one to two minutes. This is a very traditional Indian method of sterilising.
You are now ready to start layering all your ingredients. Begin with a layer of your masala mix, then add a layer of the fruit mix, add a few pieces of ginger and a few pieces of chilli, then a layer of salt. Continue in this way until all the mixes are used up. Finally add the retained juice/vinegar mix then seal the jar and leave it alone for 3 days.
On day 4 give your mix a good stir with the handle of a wooden spoon. Stir the mix every other day for 25 to 30 days after which time all the peel should be lovely and soft and all the flavours well developed. Any juices will also have thickened. If you are lucky enough to live somewhere with sunshine you can speed up the maturing process by placing the jar in sunlight for a couple of hours a day, make sure the jar is covered with a muslin cloth or a tea towel. Be patient, the end result will be worth the wait and the finished pickle can last for a very long time. It doesn't in my house as we eat it pretty quickly.
This is my fresh batch of pickle, made today so there's no photo of the final product. In 25 days or so I'll post a photo of the end result.
Wednesday, 5 October 2011
Perfect Lime Pickle
This is my recipe for lime pickle and even though it takes about a month before the pickle is ready for eating, it's worth the wait. This recipe makes a decent quantity which should last a while, unless you're like my friend Steve who eats it with everything. The last batch I made I decanted some from my large jar into smaller jars for gifts and gave away 5 jars of pickle and I still have plenty left for me. Use a glass screw top or lever top jar for storage. This pickle can last for a year or more but I guarantee you'll just keep eating it.
Ingredients
12 limes, preferably unwaxed
Ingredients
12 limes, preferably unwaxed
4 tblsp salt
10 small dried chillies, any heat you prefer
1 tsp fenugreek seeds
1 tsp nigella seeds
1/2 tsp turmeric powder
asafoetida - a pea sized amount
2 tblsp white vinegar (can use any other you like)
2 hot type fresh red chillies (optional)
zest of one unwaxed lemon (optional and not needed until pickle has 'proved')
Method
Finely chop the dried chillies and put them with the fenugreek seeds, nigella seeds and asafoetida into a heavy bottomed frying pan. Dry roast over a gentle heat until the chillies and seeds are hot to the touch. Do not over roast or they will become bitter. Set aside to cool.
You need to retain as much juice from the limes as possible and the help release juice from each lime, roll the lime firmly on a wooden board before chopping it into small pieces. I would cut each lime into at least 16 pieces. Once all your limes are cut up, put the retained juice into a jar with the vinegar.
After washing your jar in hot water, sterilise your pickle jar by placing a small amount of asafoetida in a dry pan, heat up until smoking and place the jar upside down over the asafoetida and allow the jar to fill with smoke. Leave it for 2 minutes and your jar is ready for use.
Grind your now cool chillies and seeds in a mortar and pestle to a fine powder, add the turmeric powder, this is your masala mix. If you want to use the fresh chillies, finely chop them (include seeds) but keep separate from the dry mix.
Sprinkle a layer of masala mix over the bottom of the jar, add a layer of limes, a few fresh chillies and add a good 1/2 tsp of salt, keep layering in this way until all the masala, lime, fresh chillies and salt are used up. Finish by pouring in the juice and vinegar mix.
Seal the jar and set aside for 3 days. On day 4, stir well with the handle of a wooden spoon, do not use metal. Stir the mix every other day for 25 - 30 days after which the limes should be beautifully soft and the pickle delicious.
If you have good weather you can speed up the process by placing the jar in sunlight for a few hours, cover the jar with a muslin cloth or tea towel. To add a little extra zing and summer freshness, once the pickle has proved add the zest of a lemon.
Tuesday, 20 September 2011
Tomato and Basil Soup
This soup is easy to make, delicious and a very good way to use the glut of tomatoes we get at this time of year in Spain. I make two versions, one where I roast the tomatoes, onion and garlic and one where I don't roast.
This recipe will make a generous portion for 4 people or enough for 6 as a starter. Use the best quality tomatoes you can find. Also, it freezes really well and it's simple to make larger quantities.
I always use skinned tomatoes but you can keep the skins on if you prefer. To skin just put the whole tomato in boiling water for a minute then take out and put into cold water to cool enough to handle, the skin will slide off. If you've roasted the tomatoes the skin will fall off easily once cooled enough to handle.
Non-Roasted Version
1 kg tomatoes (skinned)
1 medium onion finely chopped
3-6 cloves of garlic finely chopped (I like lots of garlic but use as much or as little as you like)
knob of butter
1 tblsp extra virgin olive oil
1 good quality vegetable stock cube made up to 1 litre of stock
1/2 tub natural yoghurt
1 heaped tsp sambal badjak
1 tsp fresh lightly ground cumin
1/2 tsp fresh ground mixed pepper
small handful fresh basil, chopped
salt to taste
Method
put butter and oil in a heavy bottomed saucepan on a medium heat. Finely chop the onion and garlic, add to the pan, stir to coat with oil and butter and cook until soft (around 7-10 minutes), after skinning the tomatoes, chop them retaining as much juice as possible then add tomatoes and juice to the pan, add the sambal, cumin and pepper, stir and after 2 minutes or so add the vegetable stock. Let everything simmer for 10-15 minutes, take off the heat and blend, put the soup back into the pan and taste, add salt if you think it needs it, add the yoghurt and basil and cook for 2 minutes on a low heat. Serve with crusty bread.
This recipe will make a generous portion for 4 people or enough for 6 as a starter. Use the best quality tomatoes you can find. Also, it freezes really well and it's simple to make larger quantities.
I always use skinned tomatoes but you can keep the skins on if you prefer. To skin just put the whole tomato in boiling water for a minute then take out and put into cold water to cool enough to handle, the skin will slide off. If you've roasted the tomatoes the skin will fall off easily once cooled enough to handle.
Non-Roasted Version
1 kg tomatoes (skinned)
1 medium onion finely chopped
3-6 cloves of garlic finely chopped (I like lots of garlic but use as much or as little as you like)
knob of butter
1 tblsp extra virgin olive oil
1 good quality vegetable stock cube made up to 1 litre of stock
1/2 tub natural yoghurt
1 heaped tsp sambal badjak
1 tsp fresh lightly ground cumin
1/2 tsp fresh ground mixed pepper
small handful fresh basil, chopped
salt to taste
Method
put butter and oil in a heavy bottomed saucepan on a medium heat. Finely chop the onion and garlic, add to the pan, stir to coat with oil and butter and cook until soft (around 7-10 minutes), after skinning the tomatoes, chop them retaining as much juice as possible then add tomatoes and juice to the pan, add the sambal, cumin and pepper, stir and after 2 minutes or so add the vegetable stock. Let everything simmer for 10-15 minutes, take off the heat and blend, put the soup back into the pan and taste, add salt if you think it needs it, add the yoghurt and basil and cook for 2 minutes on a low heat. Serve with crusty bread.
Friday, 8 July 2011
Al Andalus Trail 2011
Helen, Annick and I would like to wish all participants of this years Al Andalus Trail Ultra Marathon the best of luck.
We hope you all have a safe run and for those of you who are returning that you best last years times.
Monday, 20 June 2011
New Class Times
From Tuesday 21st June 2011 our summer class times will change to:
Tuesday - 18.00 to 19.30Saturday - 16.00 to 17.30
Prices haven't changed so each class is 7.50euros if you pay per class or 25euros if you pay for 4 classes upfront. That covers any 4 consecutive classes.
Subscribe to:
Posts (Atom)